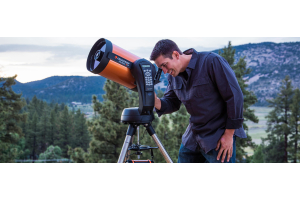
When it comes to the Celestron Origin, getting started and taking some good images is straightforward and easy! However, that doesn’t mean that there aren't tricks to getting even more performance out of this intelligent home observatory. Join along as we take a look at some setup tricks and key settings for maximizing your Origin experience!
The Celestron Origin features powerful optics, a tried and true mount and camera sensor, and a whole lot of intelligence that makes harnessing all that hardware easier than ever before. When we looked at doing an “Ultimate Guide” style piece for the Intelligent Home Observatory, it was a bit of a struggle – because once you’ve gone out and tried the Origin, you’ll see that it really is really that easy. Accordingly, this article is instead designed to highlight some tips and settings that will help optimize your Origin a bit more and ensure you’re maximizing your experience!
Talking to Your Origin
The first thing you’ll need to do with the Celestron Origin is get a line of communication going between it and the Origin app on your mobile device. There are two ways that this can be done – with your mobile device talking directly to the Origin (Built-In Wi-Fi Hotspot) or with both devices connected to and relaying messages via the same network (Home Wi-Fi Network, sometimes called “Station Mode”). As the home Wi-Fi network method requires a direction anyway, that is what we’ll be looking at first!
When it comes to directly connecting to the Origin there are two ways to go about that as well. You can either set up the communication yourself, or you can allow the Origin app to handle it. In the past, we’ve found that setting it up yourself yields the most stable results, however, the Origin app has performed well with the mobile devices we’ve used thus far, so while ‘your mileage may vary’ this may just come down to personal preference at this point.
Direct Connection Method 1 - Manually

- Navigate to your device’s Wi-Fi settings and look for the Origin’s wireless hotspot. It will have ‘Origin’ in the name, so it is easy to find.
- Connect to the Origin’s wireless hotspot, and when prompted for the password, enter: 12345555
- Some devices panic when they discover that the Origin’s hotspot does not have Internet. They will sometimes ask if you’re sure you want to stay connected to the Origin; if you get this message, make sure to accept it. If you accidentally decline, an easy way to get the prompt to return is to ‘forget the network’ and then re-join and re-enter the password.
- Pause for a minute, and make sure your device remains connected to the Origin and doesn’t try to jump to another network.
- Open the Origin app.
- The app will begin to look for the Origin on the Origin’s hotspot.
Direct Connection Method 2 - Origin App
- The app may attempt to initiate a connection as soon as it starts; however, if it doesn’t, tap the Wi-Fi icon in the top left corner to initiate the process.
- A dialog box will appear asking if you want to begin looking for the Origin. Accept to begin the process.
- Once the app “sees” the Origin’s wireless hotspot, it will ask if you want to connect to that network. You’ll need to accept this to continue.
- The app should now switch you to the Origin’s hotspot, and begin looking for the Origin on that network.
- A dialog box may appear along this process, asking if you want to allow the Origin app to find devices on your network or to make wireless changes. You will need to accept this for the automated process.
If you want to communicate with your Origin over your home network, allowing your device to remain connected to the Internet while you use the Intelligent Home Observatory, you can now do so by navigating to the Settings menu and then the ‘Telescope Wi-Fi Settings’ sub-section.


Local Wi-Fi Network Setup (Station Mode)
- In the Telescope Wi-Fi Settings sub-section, scroll to the bottom and look for your network under ‘Wi-Fi Networks Visible to Telescope’.
- If your home network has multiple bands – such as 2.4 Ghz, 5 Ghz, or even 6 Ghz (though the Origin is not 6 Ghz compatible as of the writing of this article) – then we recommend choosing the 2.4 Ghz band. You can usually tell between the two as 5Ghz bands will have a ‘-5’, ‘-5G’, or similar addition to the end of the name you gave your network.
- Tap on your home network, and then enter the password for your network.
- Once you’ve added your home network, tap on it under the saved networks section of the app.
- The app will prompt you to switch to your home network. A dialog box may appear on screen directing you to your device settings to make this change, but you can also navigate to your device settings and make the change manually and then navigate back to the Origin app as well.
- The app will count down and then begin to look for the Origin on your home Wi-Fi network.
- If the app does not find the Origin on your home Wi-Fi network, don’t worry! The app will fall back to searching for the Origin’s built-in Wi-Fi hotspot, allowing you to reconnect directly to the Origin. You can always re-establish a direct connection manually as well.
- There are several reasons the local Wi-Fi network connection may fail. If you encounter issues with this method, ensure your Origin is within range of a strong Wi-Fi signal and then run back through this connection guide. We’ve personally seen it take a few tries at times as the Origin and app attempt to navigate some unique home network setups.


Tackling Trees and Other Obstructions
Celestron has done a fantastic job automating Origin’s calibration process – simply put the Origin where you want it, level it, then turn it on and connect while the Origin looks up at the sky and calculates the alignment.
What if your desired location has trees or other tall obstructions that block Origin’s view into the night sky, though? While finding a spot that is less obstructed is the best solution, we understand (from experience!) that it is not always possible. Thankfully, there is a workaround!
Redirecting Origin’s Calibration

- Tap the ‘Menu’ icon, and then tap ‘Show Telescope Controls’.
- This will add four arrows to the screen, two on the left and two on the right edges of the screen. Tapping and holding on the arrows will cause the Origin to move in that direction until release.
- There are 4 movement speeds, adjustable by tapping the associated icon at the top right of the screen. We recommend selecting the fastest speed (4x).
- Using the directional arrows, move the Origin so that it is pointing at a clear patch of sky. As the Origin moves side-to-side during the calibration process, ensure there is also some clear sky on either side of where you’re pointed.
- Tap ‘Re-Initialize Telescope’ at the top center of the screen. This will prompt the Origin to begin its calibration routine again, however, it should now start from your custom position rather than the default.
Key Settings
For a system designed to be as automated as the Origin, there is actually a good amount of control and advanced features packed in! Below we’ve picked out some of the standout features you should know about! These are all located in the ‘Settings’ menu.

Telescope Wi-Fi Settings
- Use 5 Ghz Access Point - This toggles the Origin’s built-in hotspot from 5 Ghz to 2.4 Ghz mode. We recommend turning this off as 2.4 Ghz is generally more reliable and further reaching. While 5 Ghz has more throughput (speed), we find 2.4 Ghz is plenty fast for everything you need to do with the Origin.
- Force Direct Connection - This forces the app to try to make a direct connection with the Origin. Useful if you’ve set up the local Wi-Fi connection but are experiencing issues and just want to bypass that and control Origin directly.
Version & Updates
- Tip: To check for updates, tap and hold the right side of the screen, pull down until an icon appears at the top, and release.
- At the time of writing, the update check takes a while.
- If an update is available, make sure your mobile device and Origin have a full or close to full charge and that your mobile device has a strong connection to the Origin. You do not want this process to get interrupted.
Advanced
- Autofocus - Turn on ‘On Temperature Change’ and ‘After GoTo Any Object’. Set ‘Change After’ to a low value. This will prompt the Origin to refocus when the temperature changes and when you GoTo a new object. While this does add some time, the Celestron Origin’s autofocus is pretty quick so it is only a minimal amount to ensure you don’t spend significantly more time on target only to end up with a blurry image.
- Dew Heater - Turn on ‘Auto’. We’ve found the Origin’s suite of environmental sensors to be accurate, so Auto is likely all you’ll need (saving you battery).
- If you find you are getting dew, first try increasing the ‘Aggressiveness’ value.
- If this still doesn’t work, then ‘Manual’ allows you to force the dew heater on and control its output.
- Camera and Imaging
- Save Raw Images - To start, we recommend turning this off. These files can take up a good amount of space, so until you’re at a point where you want to process your Origin images externally we find reserving more internal space for finished images only to be optimal.
- AI Post Process, AI Deconvolution, AI Gradient Removal, Denoise Live Images, Denoise Final Images, and Denoising (Low/Med/High) - The Celestron Origin has a number of AI processing tools built-in that are designed to enhance your live view and final images. We aren’t here to say whether these are better all on, off, or some combination, as this really will come down to personal preference. Accordingly we recommend you experiment with these settings to find the combination that suits your taste best!
- Tip: You can also redo your Flat and Dark calibration frames from this menu. We strongly recommend not touching these settings. The Celestron Origin comes with calibration files from the factory, and we find these work incredibly well.
Manage Files
- Tip: To offload your files onto a USB drive, it will need to be formatted in FAT32 or exFAT. This is the default format of USB flash drives you buy at the store, so chances are you will not need to adjust this. However, if you are formatting a drive, ensure that FAT is selected (your computer will assign FAT32 or exFAT automatically).
- Tip: You can move and delete files to a USB drive individually, however, we find the most efficient way to manage files is to use the Copy All to USB button, check that everything has transferred to the drive on your PC, then use the Delete All Image Directories button to clear the Origin’s storage.
Display Options
- Tip: Under this section are quite a few sub-sections: Appearance & Behavior, Horizon & Sky, Solar System, Stars, Deep Sky, Milky Way, Constellations, Grids and Reference, and Highlighted Objects. These change your experience with the digital planetarium, from how it looks to what objects are displayed. Adjusting the magnitudes here can help you isolate your view to only bright and quick-to-appear objects for short observations or expand it to dimmer objects for longer and more dedicated imaging. You can play around with this during the day, so experiment and dial in your experience ahead of time!
Notifications
- Do not disturb between - Enabling this and adjusting the time window will allow the Origin app to send notifications only outside of that window. This is helpful if you still want notifications about exciting celestial events occurring, just not when you’re working, at dinner, etc.
Date & Time
- Advanced - The Origin app automatically will try to pull the date and time from your mobile device, however, if you find this is not being set properly, you can manually enter this information here.
- Sunset, Sunrise, Moonset, Moonrise, Dusk End, Dawn Start - These can be thought of as “jump points”; which allow you to temporarily set things to a different time. This allows you to see what the sky will look like at a certain time, plan things accordingly, and then return to the current time with the Now button.
Location
- Tip: If you’re using a mobile device without a GPS, like most Wi-Fi only tablets, then you will need to enter your location manually in this section. You’ll have probably reached this section already, as the app will guide you here often on GPS-less devices (or in cases where Location permissions have been denied). However once you enter the location once, this will be saved – so further prompts to enter your location can be ignored.
Bringing Your Origin to the Big Screen
If you want to share the Origin’s view of the night sky on a TV, there are a couple of ways you can go about this! Neither of these are a function of the app, but given how excellent the Origin is for outreach we did want to quickly touch on how this can be accomplished.
For a wireless way to share the Origin app on a TV, you’ll want to look into Screen Casting/Screen Mirroring (Android devices, like Samsung, Motorola, OnePlus, Google) or AirPlay (Apple devices, like the iPhone and iPad). Your TV will need to support this protocol as well, or have a device like an Apple TV/similar streaming box that supports it connected.
If this method doesn’t work for your mobile device and/or TV (or if you want to use a computer monitor), then you’ll want to look into HDMI dongle type devices. These typically connect to the USB port on your phone and feature an HDMI port on the other end.
Optimizing Your Imaging
Getting a great image from the Celestron Origin is pretty straightforward, as it truly does take the ‘intelligent’ part of Intelligent Home Observatory to heart when it comes to making decisions on image framing and post-processing. However, that doesn’t mean there are ways to improve your experience, such as tailoring the framing to your tastes, automating multi-target imaging sessions, and adding your own spin on final images.
Find Your Frame
By default, the Celestron Origin picks some pretty compelling framing for celestial targets, but for those looking to put their own spin on things adjusting this is thankfully simple!

- Tap the Menu, and then tap ‘Show Telescope Controls’. As discussed in the Tackling Trees and Other Obstructions section, this will bring up four arrow buttons; two on either side of the screen. A slew speed icon will also appear in the top right – a circle with either 1x, 2x, 3x, or 4x displayed.
- The rectangle on screen estimates your current frame. The solid border denotes the edge of the frame.
- Tap and hold an arrow to move your frame.
- How fast you move can be adjusted by tapping the slew speed.
- The frame can not be rotated without physically rotating the camera. Doing so would require new calibration frames, and therefore is strongly discouraged.
- Once you’re satisfied with your new framing, simply tap the Camera icon to begin an imaging session like you normally would.
The 1x manual slew speed allows you to make very granular movements, and the digital planetarium’s representation/location of deep sky objects is very accurate, so this method will likely be enough to frame the Origin up the way you want. However there is an even more precise framing method if you find the previous method is not yielding the result you’re after!
This method requires that you’re at least close to the desired framing first, so go ahead and follow the previous frame adjustment method before proceeding.

- Once your framing is close, tap the Camera icon to enter the imaging mode, but do not begin an imaging session.
- Tap ‘Reframe’ in the bottom bar.
- This will take an image, and then zoom in on it. A crosshair will be overlaid at the center of the screen.
- Scrolling around will scan your “window” into the image around the frame. You can zoom out to help get a sense of where you’re at, but you will need to zoom back in to line up the crosshairs somewhere other than dead center.
- Move your window around the frame until the crosshairs are over the location you want your new center point to be.
- Tap ‘Center Here’ to make the micro-adjustment to your framing.
- You may see the Origin begin to slew far away from where you want your framing to be. Do not cancel the process or panic – it will be coming right back, this is sometimes part of the process!
Planning an Imaging Session
With the excellent Scheduling feature you can plan out a whole night of imaging ahead of time, and then come night time just set up your Origin, launch the imaging session, and walk away! Here’s how it’s done:
- When you’re on an object’s information page, whether you got there from the digital planetarium, the Tonight’s Best selections, or the built-in object catalogs, there will be a ‘Schedule’ button on the bottom of the screen.
- Tap this to add an object to your Schedule.
- You will be brought to the Scheduling screen where you can see the object you just added, along with any other objects you have added.
- The Origin will automatically pick sub-frame settings and overall exposure times that will produce a good image of the target selected. However you can adjust these parameters for a given target by tapping on it in this Schedule view.
- You can also get to this screen from the default view by tapping ‘Tonight’s Schedule’ in the Menu.
- Once you’re ready for the Origin to begin this imaging session, set it up as you normally would and then navigate to the Schedule.
- Tap ‘Run Schedule Now’ to begin the imaging session.
- Once this is complete you can download your images from the ‘Imaging Schedules’ tab in the Menu.


Adding the Finishing Touches
Once you’ve selected to end an imaging session you’ll be greeted with three options: the option to cancel ending imaging, the option to discard all data, and then the option to save the image you just took. Opting to save the image will cause the Origin to pause while it further processes your image, and then you’ll be presented with your final image alongside some editing sliders.

By default a copy of the original image will be saved to your device, but from this screen you will have the option to overwrite that image with your edited version. You’ll also have the option to save the edited version as a copy, and this is the option we recommend using. The Celestron Origin does a great job of making sensible post-processing touches, and so saving a copy basically guarantees you’ll have a solid version of the image in the event you revisit your edited version later and feel it went too strongly in one direction or the other!
Now that you’ve learned all the tricks to maximize your Origin experience, get out there and get imaging! If you’ve found this helpful be sure to share, and check out our Astronomy Hub for more astronomy informational content, astronomy gear content, and more guides!

Learn More
Interested in learning more about astronomy and our universe? Not sure what gear or software you'll need? Check out our Astronomy Hub to learn more!