One of the most difficult astrophotos one can take is that of the International Space Station (ISS) transiting across the face of the Moon or Sun. This is because the ISS moves at 17,500 mph, and from the Earth’s perspective appears to cross the entire sky in less than 6 minutes. As a result, a transit of the ISS across the Moon or Sun takes less than a second. Most transits are often impaired by poor visibility, clouds, or being low on the horizon, making these transit shots exceptionally difficult and rare to capture. With a lot of patience, planning, and sheer luck, this type of image is totally possible!
First, we need to talk about planning. The easiest way to find a transit opportunity is by visiting the ISS Transit Finder website. Here, data from the ISS’s Two Line Elements (TLE) are regularly updated and calculated against the sky to find transit opportunities. Simply type in your location, set the time frame you’re looking to see, and how far you’re willing to travel, and it’ll tell you where you need to go! You also have the option to look up transit opportunities for Hubble and other satellites as well, but the ISS has the largest angular diameter, thus making it the easiest of any.
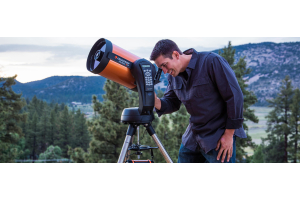
Next, we’ll need to consider what type of camera and telescope is best. Generally speaking, you’ll want to use a DSLR or CMOS sensor with a very fast shutter speed. Let’s assume you have an APS-C type camera ready for this purpose. When selecting the best telescope for capturing an ISS transit across the Sun or Moon using an APS-C camera, the focal length significantly impacts the field of view (FOV) and the ability to frame both the Sun or Moon and the ISS effectively. An ISS transit is a fleeting event, lasting less than a second, requiring a balance between a wide enough FOV to capture the Sun or Moon’s 0.5-degree disk and sufficient magnification to resolve the ISS’s silhouette (which is usually comparable to the angular diameter of Jupiter or Saturn). A 300mm focal length telescope provides a wide FOV (approximately 4.48° x 2.98° with a 23.5mm x 15.6mm APS-C sensor), ensuring the entire Moon is captured and framed up easily with even a photo tripod. For portability and ease of use, this setup is a great option. However, the ISS will appear tiny, occupying only a small fraction of the frame, potentially lacking detail even with a high-resolution sensor. This focal length is better suited for beginners or those prioritizing ease of use over detailed ISS imaging, as it simplifies locating the Moon and reduces the need for precise tracking during the transit.
In contrast, a 600mm or 900mm focal length telescope offers a narrower FOV (2.24° x 1.49° at 600mm; 1.50° x 0.99° at 900mm), which enhances the Sun or Moon’s size in the frame (22.3% and 33.3% of the width, respectively) and provides greater detail of the ISS’s structure. The 600mm focal length strikes an optimal balance, capturing the full lunar or solar disk while magnifying the ISS enough to reveal its solar panels and modules, assuming good optics and a high-frame-rate camera to freeze the motion. A 900mm telescope would give one a tighter field-of-view with more detail, but risks a tight FOV that may clip the Sun or Moon or complicate tracking, demanding more precise mounts and resulting in less portability. For most astrophotographers using an APS-C camera, a ~600mm telescope is the best choice for ISS transits, offering a practical compromise between magnification, FOV, and manageability, provided the setup includes a robust tracking system and favorable atmospheric conditions. A telescope like the Apertura 90mm Triplet Refractor or even an Explore Scientific 102mm Doublet would be great options for this purpose.
Next, figure out what type of transit shot you’re interested in – Sun or Moon? The Sun is a very popular choice, but be aware that capturing a solar transit shot requires a solar filter. NEVER POINT YOUR CAMERA AT THE SUN OR LOOK AT THE SUN WITHOUT SOLAR PROTECTION! If you choose to go for a solar transit, we recommend checking out our solar filter guide. For a lunar transit, no solar filter is needed - just make sure your focus is good and you’re all set! Now, to consider shutter speed. We briefly touched on this earlier, but in general, you do not want to have a shutter speed greater than 1/500. This is because you’ll end up with motion blur on the ISS, blurring your image and reducing the overall visibility of the transit. The downside of this approach is that you may be forced to increase the ISO (and overall noise) of your image. A general rule of thumb we recommend for DSLRs is an ISO of 800 and 1/2000 for a good quality ISS transit, depending on your focal length.
Capturing the ISS as it transits the Sun or Moon is challenging, there's no doubt about it. But with the proper planning, precise timing, and the right gear, you'll be well prepared to give it a shot. You just might end up with your new favorite astrophoto!
Learn More
Interested in diving deeper into the world of astronomy? Check out our Astronomy Hub for a wealth of articles, guides, local resources for planetariums and observatories near you, and more to enhance your stargazing experience.


